

How To Make A Life Size Fake Tree
DIY Faux Tree: how to make a realistic Faux indoor tree
Want the await of an expensive, realistic tree only don't desire to pay the cost tag? Don't like the cheap look of the fake trees that still accept hefty prices of $200 or more? Ever thought of making your ain? Well, I hadn't either, until recently. Creating a DIY false tree is a genius thought that we know you're going to want to try.

I'm not going to sugarcoat it or pretend this projection is piece of cake. Information technology took me two weekends to complete, partly because I had to look longer for the cement to dry. If you don't make your cement also wet, you could probably get information technology done in one weekend if you lot piece of work hard. You could also make a slightly smaller tree. Our tree is not only tall only really branched out (pun intended). But information technology is worth it. In the finish you will take a tree that is more than realistic than any tree you can buy at any cost. Audio enticing? Keep reading!
Supplies Needed for Your DIY False Tree
The proficient news is that the supplies are not complicated, expensive, nor hard to find.
Tools you lot volition demand:
- Pole tree trimmer or something to cutting the branch.
- Handheld cement mixer or shovel or something to mix the cement.
- Wheelbarrow or some identify to mix the cement.
- Utility knife
- Regular pair of scissors (for the floral record)
- Gorilla gum
- Measuring tape
Supplies y'all will demand from the Hardware store:
- Quick-fix cement – smallest bag (approx. 50 lbs.)
- Small-scale plastic bucket – ten-quart size. 5-ten quarts depending on the size of the tree you are making.
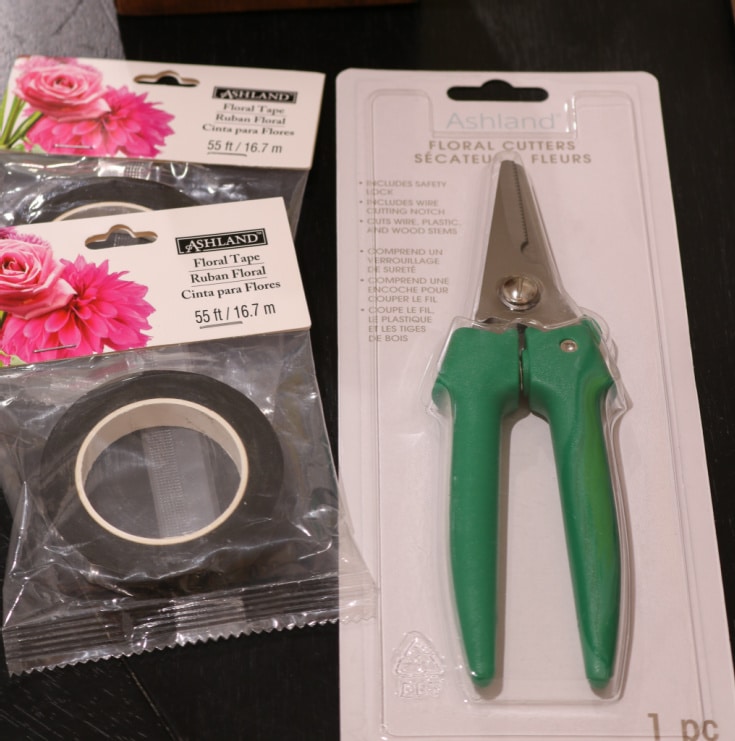

Supplies y'all will need from the Craft store (Michaels):
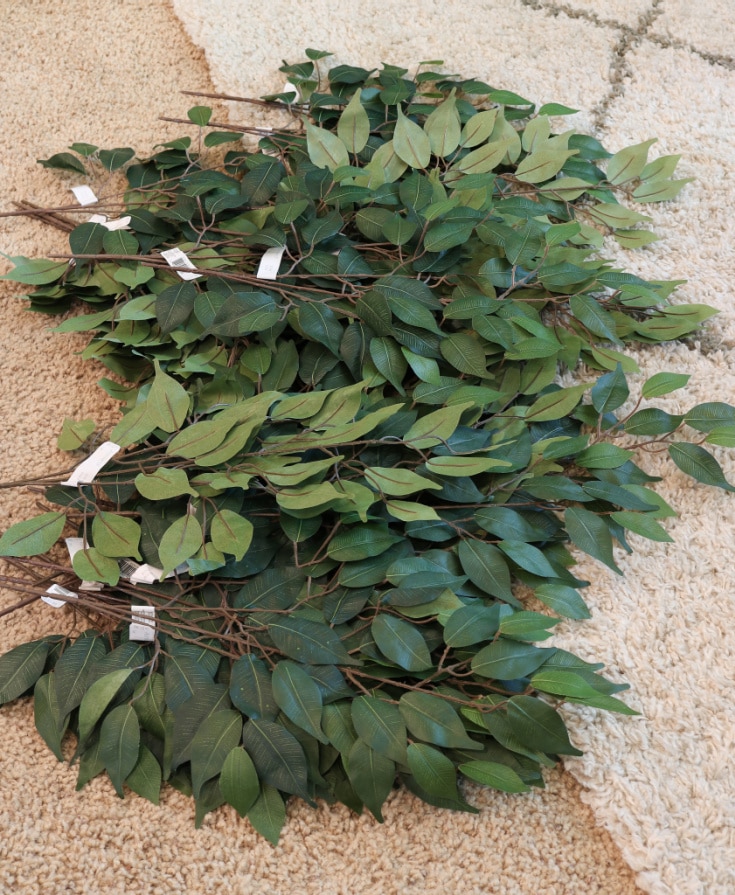
- Floral stems or "leaves": for my tree I used thirty.

- Wire cutters (to cut the leaves if needed)
- Floral tape
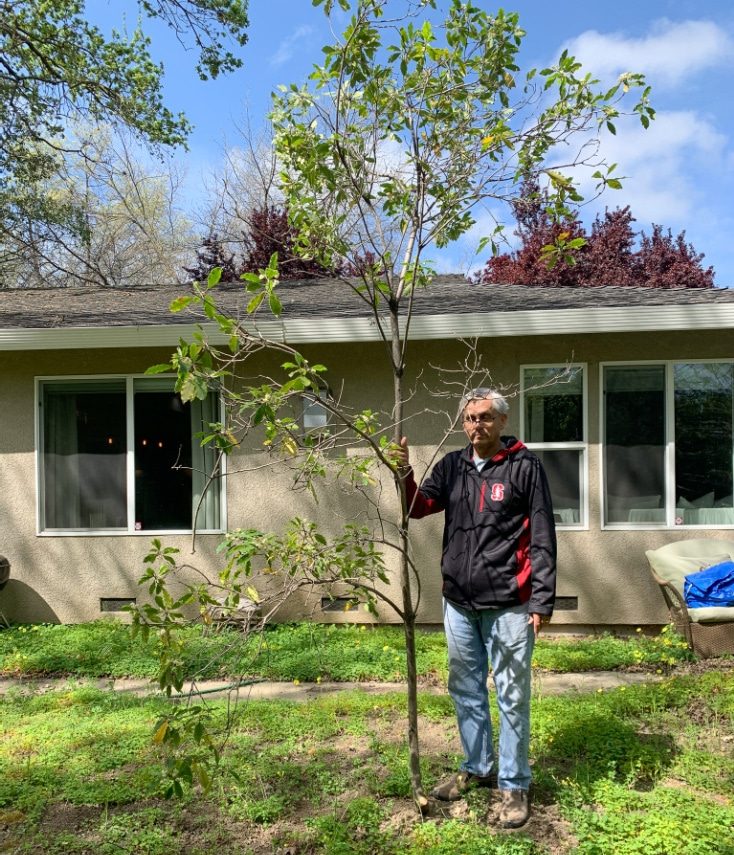
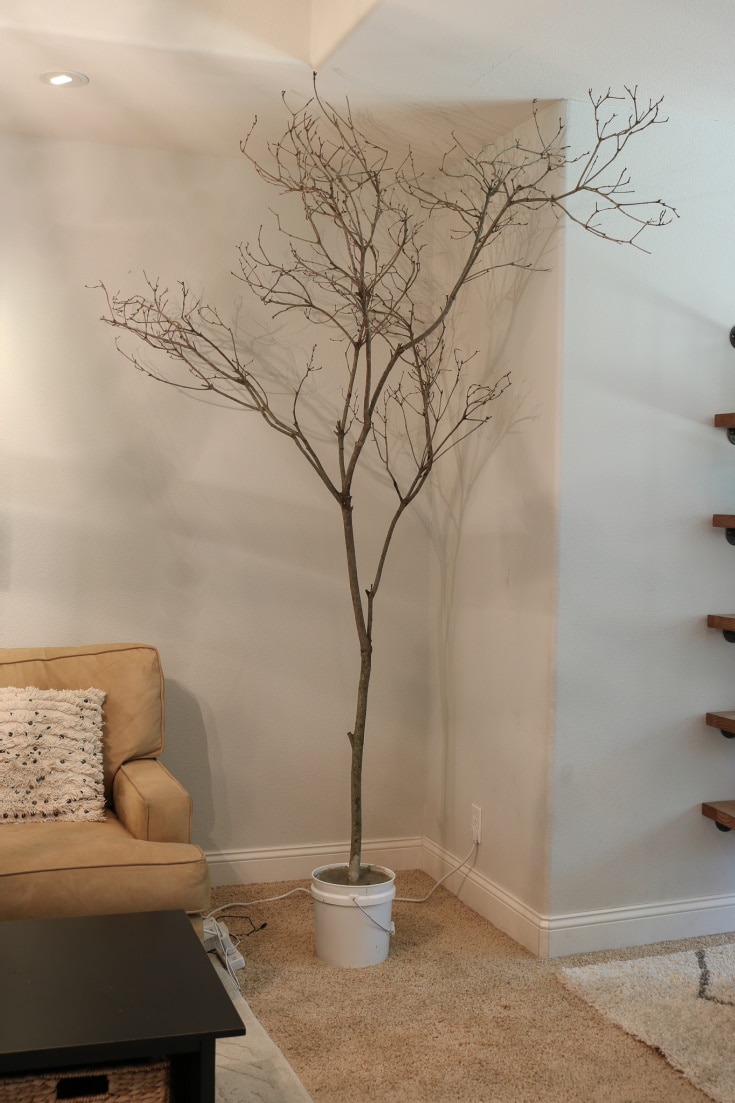
Step 1. Getting Your Branch for Your DIY Faux Tree
Notice your branch and cut it down.
What to look for in a branch:
You want to look for a branch that is as straight as possible. It should accept lots of pocket-size branches or foliage at the end where yous will be able to add your faux leaves. Ours is but about an inch thick. You don't desire it also big and heavy to maneuver and carry around. This size worked just perfectly.
Take into consideration the space you'll be putting your DIY faux tree. How alpine are the ceilings? Use a record measure to be sure information technology will fit and look good.
- Mix your cement. We used a wheelbarrow, but you could use any advisable size bucket. Mix according to directions.
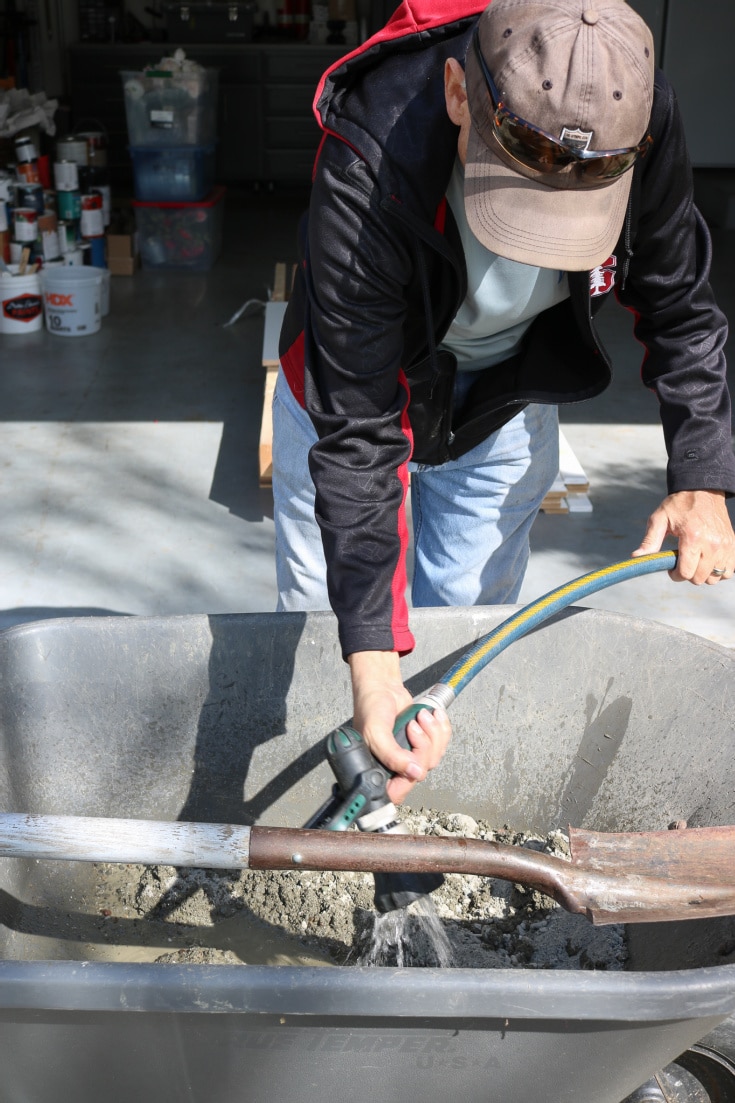
- Once your cement is mixed, cascade into your container saucepan for your DIY fake tree.
- While Pecker was preparing and mixing the cement, I was pruning the branch & removing all the existing leaf.

- Insert your branch into the cement all the way to the bottom (so your branch touches the bottom.)
- To secure the branch while drying in the cement, we leaned it against the bushes and so tied it against a ladder to secure so the wind wouldn't blow information technology over. If y'all don't have something to lean it against you could use clamps to secure it in the bucket.
- Allow cement at to the lowest degree 24 hours to dry thoroughly before moving and continuing with next pace of the project.
Note: Our cement was very wet and needed an extra day to dry thoroughly.
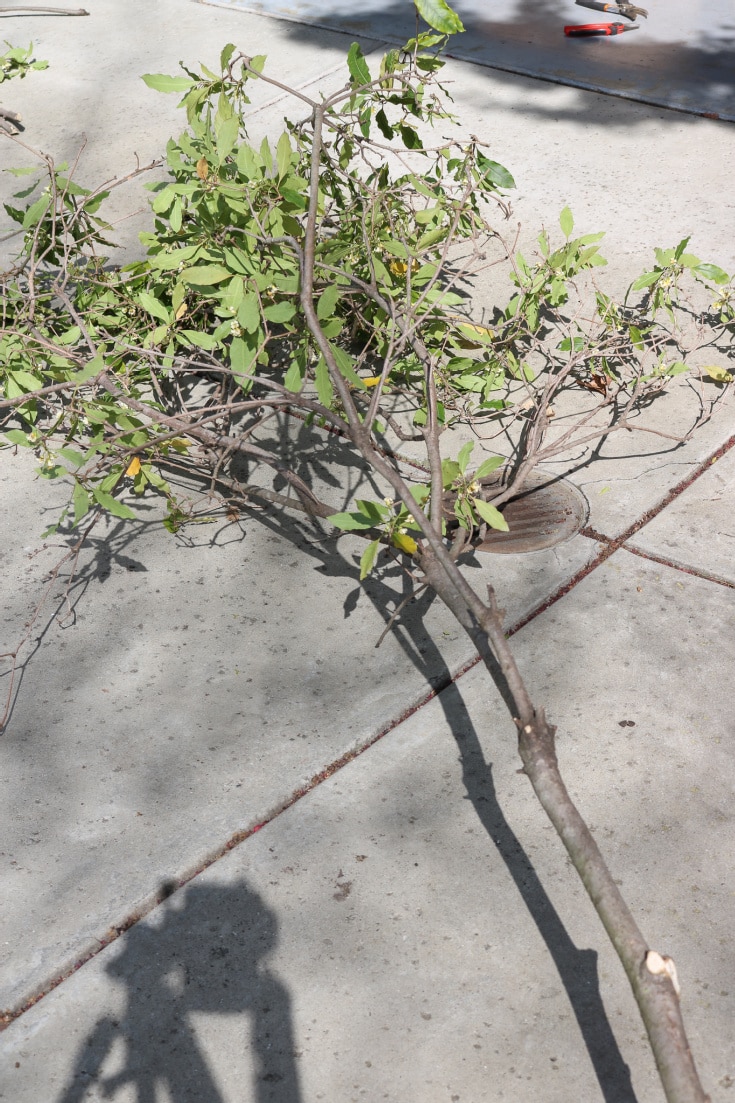
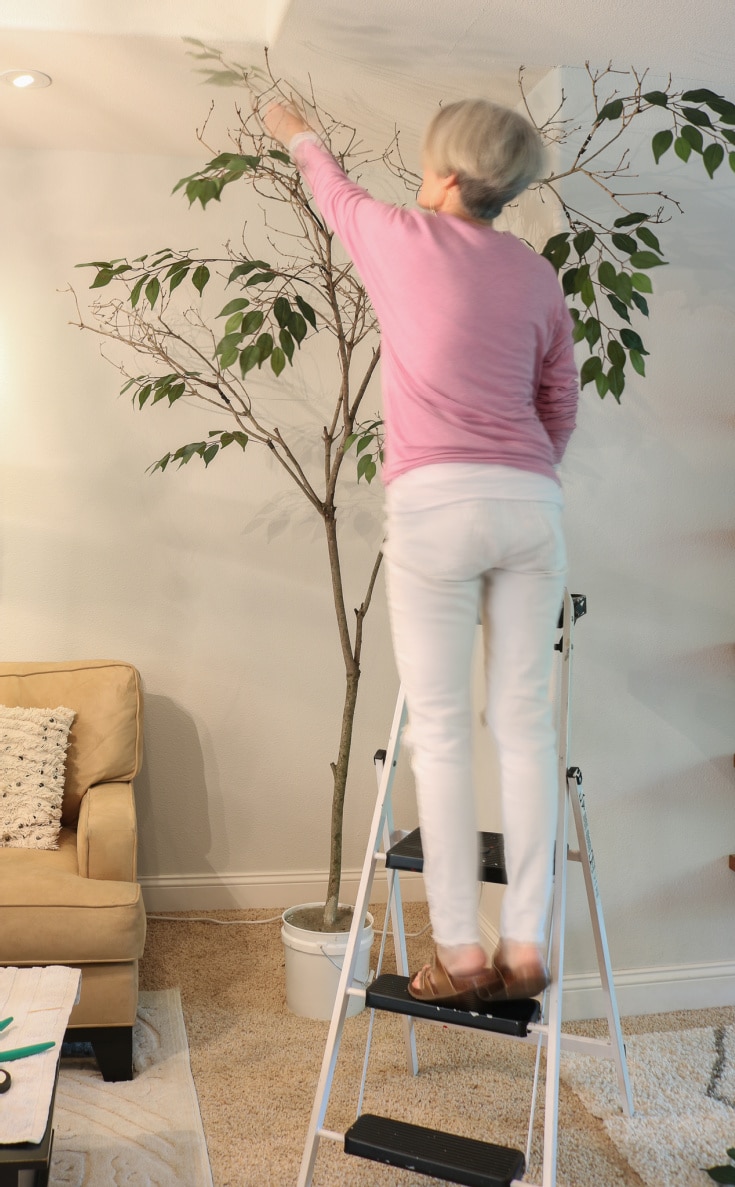
Pace 2. Attaching the Leaves to Your DIY Faux Tree
- In order to create a natural expect, I decided to carve up the leaves into smaller sections of three.
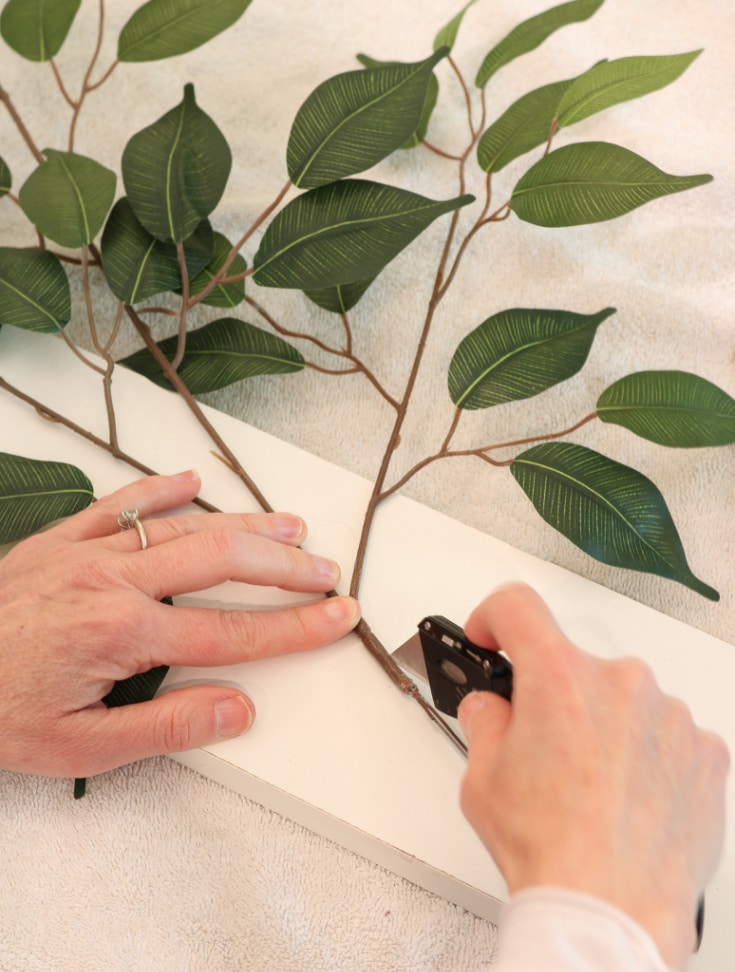
- I used my utility knife and removed the outer layer of plastic from the bottom 3 inches. Then I was able to separate the leaves into 3 split leaves/stems.
- I separated 25 of the 30 stems and left v stems in their original size.
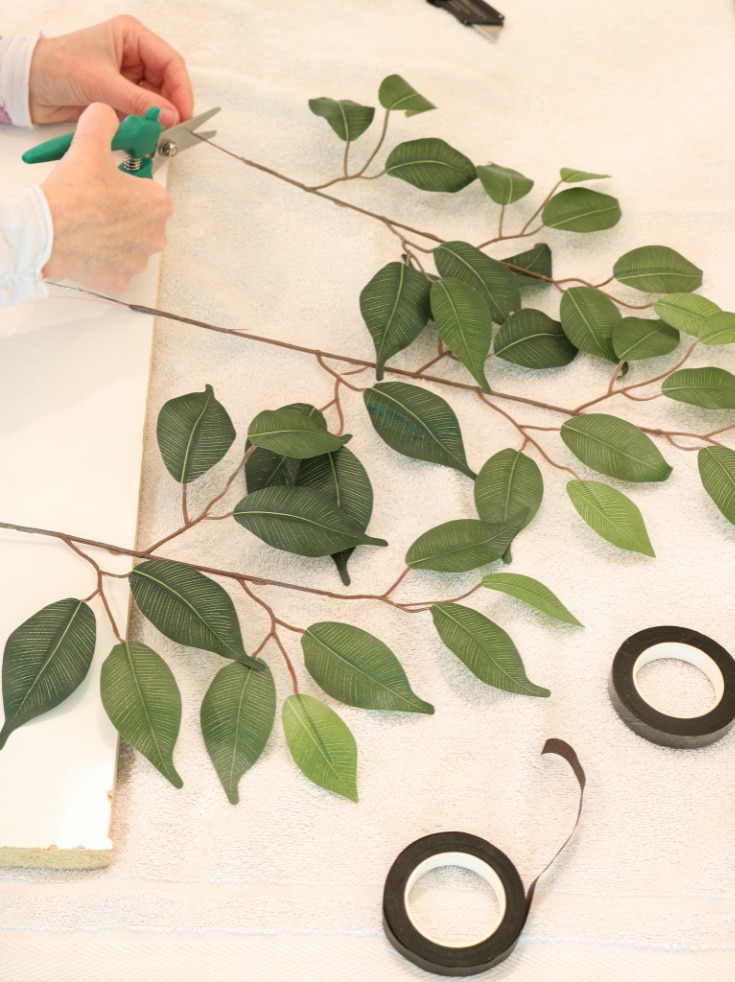
- Start attaching leaves using the floral record.
At this indicate I decided to movement my "tree" into the space where information technology would alive considering I wanted to get a feel for how I wanted it to look in the space. Y'all don't have to do this, merely it was helpful for me to know how I wanted information technology to await and feel in the actual space it was going to exist.
Step 3: Sculpting Your DIY Imitation Tree
This next phase is what I like to call the sculpting phase. Y'all are literally creating or "sculpting" a tree. There is no right or incorrect way to practise it. Copse are natural and organic. But if y'all get stuck, go outside and await at how copse really wait. I started from the bottom with the pocket-size individually pieced branches (meet beneath how I separated the faux stems), and I worked my way upwardly and out.
Eventually I added the total branches with the three stems intact to create the canopy look and feel of a real tree. For me, the process took a long fourth dimension because I did a lot of looking and analyzing where pieces should get. I think I could take gone quicker, but the outcome wouldn't accept looked as realistic. I took my time to create just the expect I wanted.
How to Attach a Leaf Using Floral Record
- Cutting a piece of floral tape nearly 25" – 30" long.
- Stretch floral record in order to activate the stickiness.
- Exist conscientious not to stretch too tight or floral record will rip. If information technology rips just starting time where you left off and start wrapping again.
- If the leaf withal seems insecure wrap with an additional piece of floral tape until secure.
- Wrapping the stretched tape over itself makes information technology stick. The tape is covered in a wax adhesive that simply sticks to itself.
- I had heard that information technology was a adept thought to use gorilla mucilage to secure the ends simply to be certain because the floral tape might not stay, but I had a lot of issues with the gorilla glue beingness a mess.
- Note: It's a skilful idea to use clear gorilla glue, mine was white and I realized that clear would take been better.
- Floral tape is supposed to stick if wrapped and stretched and stuck to itself. If I exercise this over again, I might opt not to use the gorilla glue and merely stick with the floral record.
- When you want to stop using the floral tape pull information technology taught and wrap the stretched tape over itself to go far stick. That's information technology.
- If yous have trouble and you see that your ends start to pop upwardly, yous tin can e'er get dorsum and secure the ends with gorilla gum and so.
- Notation: Don't worry about the dark color of the brown floral tape standing out and being seen. When you are done you lot can pigment the tape to get in alloy in, and you won't notice information technology at all.
Large Leafage Sections
The terminal stage is when you add the full-size stems. These stems have all three sections of leaves. Be sure to add the leafage stalk to a stronger, thicker branch for support.
- One time the branch bankrupt while I was securing it. I simply secured information technology farther downwards closer to the base of the stem.
- Some other time I decided to add a toothpick to the "frame" of the leaf for support. I secured the toothpick forth with the foliage and branch with the floral record. This helped requite the added support that was needed.

Final Stages of Your DIY Faux Tree
Go on securing your leaves until you have either used all your leaves OR your tree looks and feels full enough.
Here are some tips:
- You don't demand to comprehend every branch with a foliage.
- You also do non need to break off or get rid of the bare branches.
- I retrieve it makes information technology look more realistic if there are some blank branches.
- Attempt to call back of a false tree that yous have seen that has blank branches on it…. none. Right? It is a sure sign of a real tree if y'all go out those bare branches mixed in with your simulated leaves.
Covering the Floral Tape
Not liking the dark dark-brown color of the floral tape? Now is the time to get out your craft paint and do a little cover-up painting. My bark was basically a gray colour.
I mixed blackness, gray, brown, and white paints together until I got the perfect shade.
I blended all the tape in until you couldn't notice it at all.

Project Completed
After 2 weeks and what felt like thousands of hours of work, I finished my DIY faux tree.
Simply I am in Dear. I don't think any amount of money could buy a tree as overnice as this. I still don't have a planter that is worthy of my tree, and so that is my next project.
Immediately I want to brand another ane. But it's time to take a suspension and rest upwards. I think I'll brand a smaller tree next fourth dimension. The space I want it for is smaller. Retrieve, y'all tin make a huge touch, and your tree doesn't have to be as large as mine.
Have fun with this project. And definitely ship me comments about how your tree turns out and anything you learned forth the way. If it'south helpful I might add the information to this postal service.
Ever thought of decorating with flowers? Flowers make the perfect addition to your dwelling, especially in spring & summer. Bank check out our blog post all about how to decorate with flowers for more than ideas.
jodie & julie

Summary

Commodity Name
How to Make a Stunning DIY False Tree That Looks Real
Clarification
No green pollex? No worries. Create this gorgeous DIY faux tree & fool everyone. No watering, no sunlight. Put this beautiful tree anywhere!
Author
The Blueprint Twins
Publisher Name
The Blueprint Twins
Publisher Logo


Source: https://www.thedesigntwins.com/how-to-make-a-stunning-diy-faux-tree-that-looks-real/
Posted by: blackalver1982.blogspot.com
0 Response to "How To Make A Life Size Fake Tree"
Post a Comment